
Key takeaways
Translate the character’s promise into a visible mood such as mercy, vigilance, duty, defiance, patience, or regret.
Make the face and posture lead before armor, shields, weapons, emblems, or magical atmosphere enter the design.
Use two or three materials and a controlled color relationship so plate armor remains readable instead of becoming visual noise.
Choose one original personal emblem and one supporting object, then connect both to the individual rather than a generic holy-warrior costume.
Give sacred-looking light one practical job: reveal the eyes, separate an armor edge, or clarify the protective silhouette.
Start D&D paladin character design with the oath-driven mood
Begin with what the character has promised to protect, repair, resist, or remember. You do not need to quote a rulebook oath or summarize a complete backstory. Choose one visible quality that grows from the promise: mercy can soften the gaze and open the shoulders; vigilance can create a level stare and squared stance; duty can appear through carefully maintained gear; defiance can sharpen the chin and place the shield forward. This first decision gives every later color, material, and object a reason to exist.
Keep the mood attached to the individual rather than to the Paladin label. Two characters can wear similar plate armor while one feels patient and approachable and the other looks exhausted but unbroken. Name the present expression in practical terms: calm resolve, guarded compassion, restrained anger, tired concentration, quiet pride, or visible doubt. A specific moment makes the portrait feel like a person responding to a situation instead of a costume posed for display.
Use contradiction when it reveals history. Polished armor with a repaired cloak may suggest formal duty carried through difficult travel. A confident stance with a damaged emblem can imply a promise that survived a failure. A warm expression beneath severe armor can make a protector feel humane. Choose one tension and let it shape the face, posture, and equipment condition; several competing dramatic ideas will make the brief harder to read.
Use posture to show protection, command, or doubt
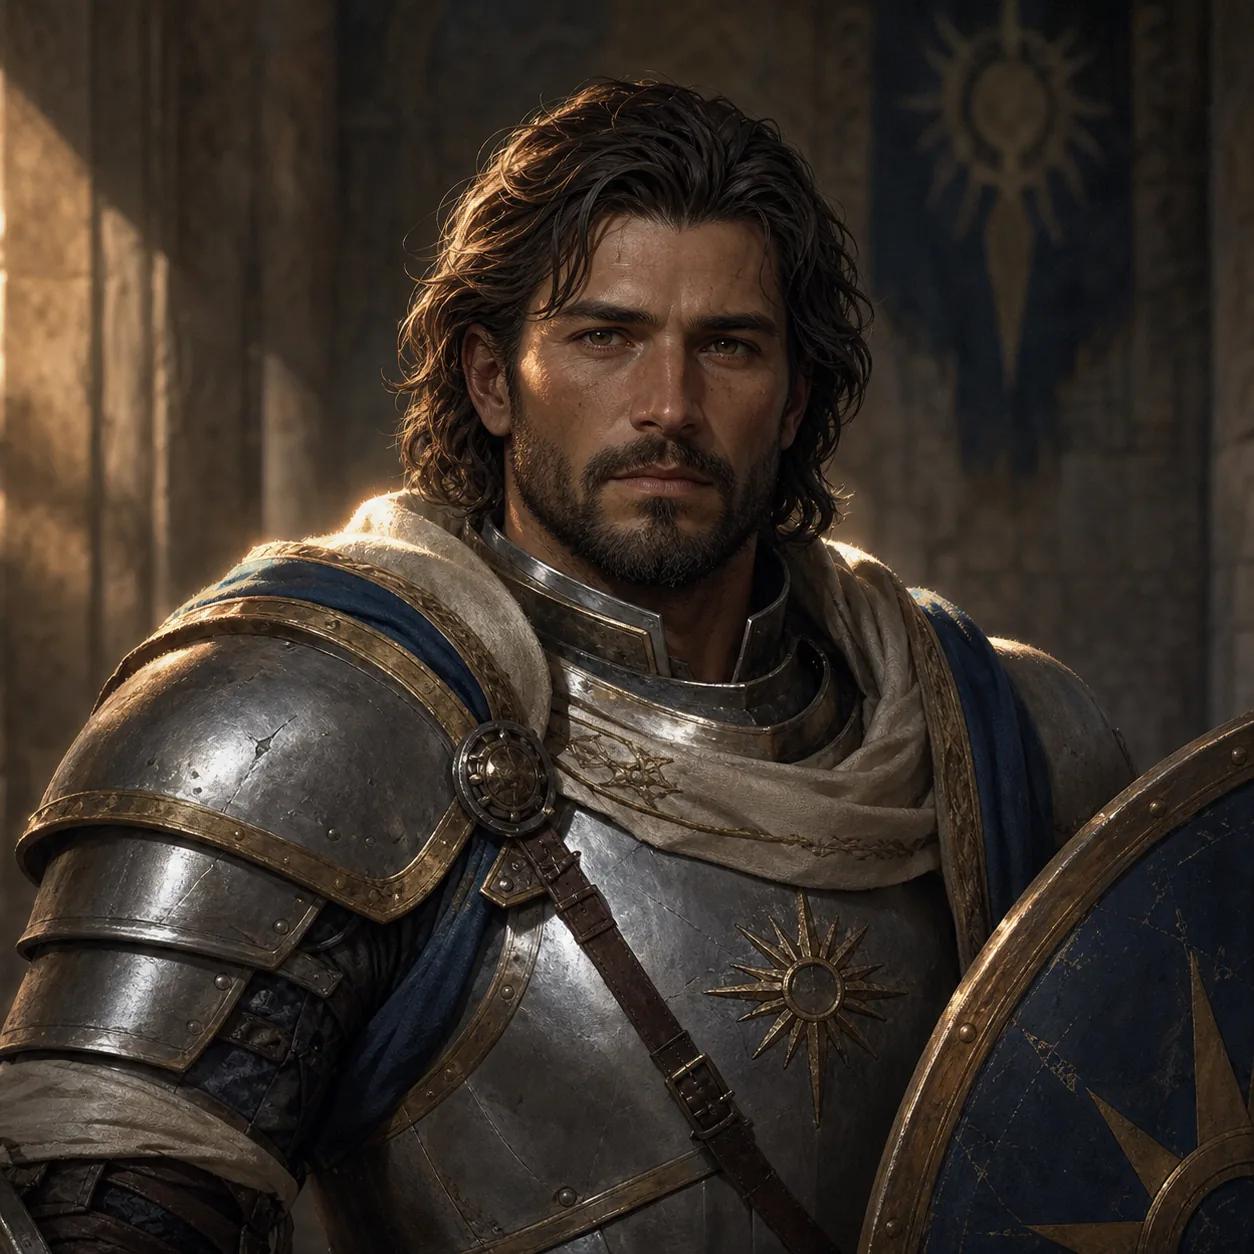
Posture is the fastest way to turn an abstract value into a readable silhouette. Squared shoulders and a level head can suggest readiness. One shoulder angled toward a shield can feel protective. A lowered chin with direct eye contact can show humility without weakness, while a slightly turned torso can make a cautious or conflicted character feel less ceremonial. Keep the pose inside an upper-body frame so the face, shoulder line, and one hand or object remain large enough to recognize.
Decide where the visual weight sits. A shield edge near the shoulder creates a broad defensive shape; a sheathed weapon forms a quieter diagonal; clasped hands or a pendant can draw attention toward the center of the chest. Use only one main gesture. A raised sword, lifted shield, flowing cloak, prayer pose, and dramatic turn all competing in a square frame will reduce the face to a small detail.
Test the silhouette without color or decoration. The head, neck, shoulders, and protective object should form three distinct shapes against a quiet background. If the helmet, cloak, shield, and pauldrons merge into one heavy block, remove a layer or shift the object outward. Paladin identity does not depend on making every shape larger; it depends on making the protective intent and emotional center easy to see.
- Protective: angle one shoulder or shield edge toward the viewer while keeping the face open.
- Commanding: use balanced shoulders, level eyes, and one clean vertical armor or cloak line.
- Reflective: lower the chin, soften the hands, and reduce the background contrast around the body.
- Conflicted: combine a stable silhouette with one damaged, repaired, or deliberately hidden identity detail.
Organize paladin armor, materials, and color
Plate armor gives a Paladin a strong visual signal, but the portrait still needs hierarchy. Choose one dominant chest or shoulder shape and describe its condition before adding decoration. Polished ceremonial plate, scratched field armor, repaired steel, darkened metal, layered mail, or travel-worn leather each tells a different story. Keep the neckline open enough that the face and expression remain connected to the body rather than floating above a metal wall.
Limit the design to two or three materials. Brushed steel can carry broad highlights, worn leather can separate straps from plates, and heavy cloth can soften the shoulder line. If every plate has a different trim, engraved pattern, gem, and reflective edge, the armor becomes noise at thumbnail size. Let one material dominate, one support the joints or straps, and one appear as a cloak, scarf, tabard, or small accent near the face.
Build color around the character’s mood instead of treating alignment or class as a fixed palette. Muted ivory and blue can feel steady, charcoal and worn red can feel severe, green and bronze can suggest a traveling guardian, and pale cloth against dark steel can make a reflective character feel restrained. Choose one dominant neutral, one supporting color, and one small accent. Repeat the accent once near the emblem or shield, not across every buckle and background banner.
Armor readability test
View the portrait at a small size. You should still see the face, one shoulder or chest shape, one supporting material, and the edge of the main object. If the eye jumps between many highlights, simplify the trim before adding detail.
Choose one personal emblem and one supporting object
An emblem works when it belongs to the character’s promise, community, memory, or responsibility. Create an original simple shape—a divided sun, open hand, mountain line, watchful eye, broken ring, branching path, or another campaign-specific mark—and explain where it appears. A small chest badge, shield device, clasp, pendant, or stitched border is enough. Avoid copying an official faction mark or filling every armor plate with the same symbol.
Then choose one supporting object. A shield emphasizes protection, a sheathed sword suggests controlled readiness, a hammer can connect duty to craft, a pendant can make the promise personal, and a worn book or letter can point toward memory rather than combat. Keep the object partly visible and close enough to the body that it supports the square crop. If both a shield and weapon are important, make one dominant and reduce the other to an edge, hilt, or strap.
Condition gives the emblem and object meaning. A pristine shield can suit a newly appointed guardian; a repaired rim can show repeated service; a scratched emblem may suggest hardship; a carefully polished keepsake can reveal private devotion. Describe one kind of wear and where it appears. Random damage across every surface reads as texture, while one repaired crack or rubbed handle reads as history.
- Original emblem: one simple shape connected to a personal promise or campaign detail.
- Placement: chest, clasp, shield, pendant, or narrow cloth border away from the eyes.
- Main object: shield, sheathed weapon, hammer, keepsake, book, letter, or other visible anchor.
- Condition: polished, repaired, weathered, inherited, deliberately altered, or recently damaged.
Use sacred light without hiding the face
Sacred-looking light should perform a practical portrait task. A warm side light can reveal the eyes and cheek; a narrow rim can separate a shield from the background; a soft glow near an emblem can guide attention toward the chest without becoming the brightest object. Name the direction, color, and purpose of the light. “Warm light from the left revealing the face and shield edge” gives clearer guidance than “surrounded by divine energy.”
Keep the effect restrained around armor. Plate already creates bright reflections, so a large halo, beam, sparks, runes, and glowing weapon can scatter attention across the frame. Let the strongest highlight sit near the face, then reduce reflections toward the shoulders and lower crop. If the emblem glows, make it subtle enough that the eyes still hold the emotional focus. Controlled light can feel sacred through mood and placement without declaring a specific religion.
Give the background one quiet role. A stone sanctuary, weathered gate, dawn sky, torchlit hall, ruined chapel, or open road can support the promise without becoming a full scene. Simplify shapes directly behind the head and shield. The background should explain where the light comes from or what the character protects, then recede so the silhouette survives in a small campaign image.
One-light rule
Choose one dominant light source and one soft fill. If a third glow does not reveal the face, emblem, shield, or armor boundary, remove it from the first portrait brief.
Turn D&D paladin character design into a portrait brief
Write the brief in the order a viewer should read the result: individual identity, Paladin role, ancestry, oath-driven mood, face and expression, posture, armor shape and condition, two or three materials, personal emblem, one object, controlled light, quiet background, and upper-body square crop. A compact opening might read: “A patient human Paladin with calm brown eyes, protective squared shoulders, repaired silver plate over deep blue cloth, a divided-sun emblem, and the edge of a weathered shield lit by warm morning light.” The sentence establishes the person before atmosphere enters.
Review the first image by diagnosing one visible mismatch. If the character looks generic, strengthen the expression, emblem, or equipment condition. If the armor overwhelms the face, simplify the shoulder plates or reduce reflections. If the Paladin feels like a glowing effect rather than a person, remove secondary light sources and return contrast to the eyes. If the portrait feels too martial, replace a raised weapon with a shield edge, pendant, letter, or relaxed hand.
Preserve the strongest identity anchors while revising. Keep the face and mood while changing the armor color, keep the emblem and shield while testing a more open posture, or keep the material hierarchy while moving the light. NanoEditor creates one image per generation, so changing one category at a time makes each comparison more useful. One successful guest generation is shared across the site; Google signup grants 20 credits, each portrait costs 10 credits, and failed generations do not consume the allowance. Account results are private by default.
Open the D&D paladin portrait generator with Paladin preselected when the brief is ready. Enter the visible choices into the matching ancestry, presentation, equipment, appearance, and mood controls instead of pasting a rules build or long biography. The finished D&D paladin character design should remain understandable as one face, one protective silhouette, one personal mark, and one clear emotional promise.
- First pass: mood, face, posture, armor, materials, emblem, one object, light, background, and crop.
- Thumbnail check: face, shoulder shape, object edge, emblem, and expression remain separate.
- Revision check: change one weak category while preserving three or four stable identity anchors.
- Scope check: keep the output to one upper-body square portrait, not a sheet, stat block, token set, full-body scene, or party image.
Put the guide into practice
Create a D&D paladin portrait
Start with Paladin preselected, then turn the oath-driven mood, posture, armor, emblem, equipment, and lighting plan into one focused upper-body portrait.
Start creating