
Key takeaways
Make the face and weight-bearing posture lead before adding armor, weapons, or background action.
Choose one practical armor silhouette and two or three materials that communicate training and travel.
Give the Fighter one signature weapon with a visible position, condition, and reason it belongs to the character.
Use one battle-worn detail or personal mark as history instead of covering every surface with random damage.
Test the final brief as a square thumbnail and revise one visual category at a time.
Start D&D fighter character design with the fighting discipline
A Fighter becomes recognizable through the way they prepare, stand, and carry equipment—not through a single mandatory costume. Begin with a discipline such as patience, endurance, precision, vigilance, adaptability, or controlled aggression. Translate that quality into a visible choice: a level gaze, a balanced stance, a hand resting near the weapon, a carefully maintained strap, or a compact posture that suggests the character knows how to conserve movement. The choice should belong to this individual, not to every Fighter in every campaign.
Put the face before the gear. Decide the age range, facial structure, hair or grooming, expression, and one memorable feature before describing the battlefield or dramatic background. A calm veteran, an eager recruit, and a weary caravan guard can all use similar equipment while looking like different people. If the character’s eyes and mouth are readable, the viewer has an emotional anchor for the armor and weapon that follow.
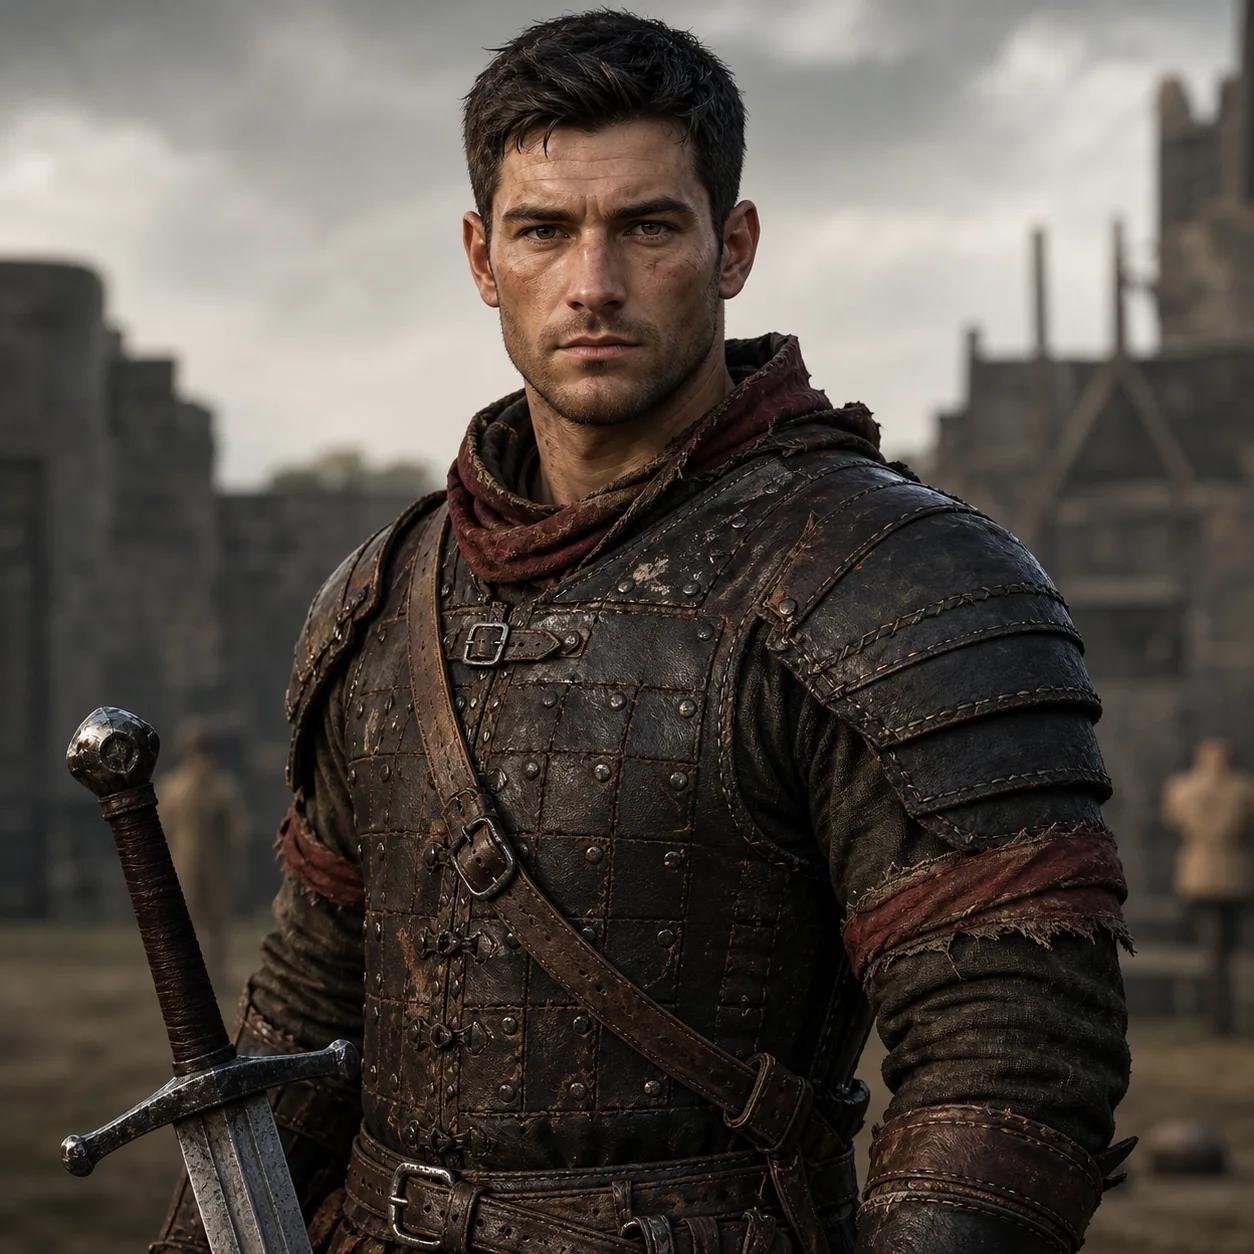
- Discipline: patience, vigilance, precision, endurance, adaptability, or another visible quality.
- Face: clear eyes, specific expression, one memorable feature, and enough open space around the head.
- Posture cue: balanced weight, squared shoulders, angled torso, or one controlled hand position.
Use posture and silhouette to show training
Posture is one of the fastest ways to communicate a trained fighter in a portrait. Squared shoulders and an even head can suggest readiness; a slight turn can suggest awareness; a lowered weapon can show restraint; and a forward shoulder can make a guard or protector feel attentive. Keep the gesture compact enough for an upper-body crop. A full lunge, raised blade, flying cloak, and crowded battle scene ask the portrait to explain too many actions at once.
Think in three connected shapes: the head and face, the shoulder-and-armor outline, and one weapon or hand position. The head should separate from the background, the shoulders should have a dominant line, and the weapon should create a readable diagonal or vertical accent. If the helmet, cloak, pauldrons, and weapon merge into one block, remove a layer or move the object toward the crop edge. A simple silhouette gives later details somewhere to live.
A fighter does not need to look permanently aggressive. A steady expression, relaxed grip, or weight shifted onto the back foot can suggest experience and self-control. Choose the moment that matters for the character: standing watch, returning from a patrol, protecting a companion outside the frame, or preparing for a duel. One clear moment usually creates more personality than a generic command to look heroic.
Silhouette check
Imagine the portrait as a dark shape. If you can separate the head, shoulders, and one weapon or hand position, the training cue will survive a small crop more reliably.
Build practical armor with a clear material hierarchy
Armor should explain how the character moves and what they have lived through. Choose one dominant upper-body shape—brigandine panels, layered leather, mail under a coat, a breastplate, a padded jacket, or another campaign-appropriate structure—then name its condition. Maintained gear can suggest routine and discipline; repaired gear can show service; mismatched pieces can point to travel, limited resources, or a changing role. These are visual storytelling options, not rules about what a Fighter must wear.
Limit the first brief to two or three material families. Worn leather can separate straps from a brushed metal plate, heavy cloth can soften the shoulder line, and dull metal can frame a brighter weapon edge. Describe how each surface responds to light instead of asking for maximum detail everywhere. Broad highlights, visible seams, and one quiet transition between materials make armor easier to understand at thumbnail size.
Keep practical details subordinate to the face. A buckle, guard, glove, shoulder patch, or scabbard strap can tell the viewer how the equipment is used, but a dozen pouches and engraved plates become inventory. Choose one connection detail that makes the armor feel functional, then leave negative space around the eyes and mouth. The character should still read when the viewer stops inspecting the gear.
- Dominant shape: choose one chest or shoulder structure that defines the upper-body silhouette.
- Materials: use two or three surfaces such as leather, cloth, mail, wood, or brushed metal.
- Condition: name one state—maintained, repaired, scuffed, patched, inherited, or travel-worn.
- Connection detail: show one strap, seam, glove, buckle, or scabbard that makes the gear functional.
Give the Fighter one signature weapon with a reason
A signature weapon works best when it has a visible role in the character’s history. A longsword can be plain and carefully maintained, an axe can show repaired haft wood, a spear can suggest guard duty or travel, a bow can pair with a watchful stance, and a hammer can connect the fighter to craft or a former trade. Choose the object that supports this person’s identity, then decide how much of it belongs inside the upper-body crop.
Position matters more than a long weapon list. A hilt at the hip, a blade edge near one shoulder, a lowered spear shaft, or a hand around a wrapped grip can be enough. Keep the face unobstructed and make one object dominant. If a shield, second weapon, trophy, or tool is also important, reduce it to a strap, handle, or partial edge so the portrait has a clear visual order.
Describe condition and use rather than claiming a special power. A worn grip, repaired guard, dulled edge, polished pommel, or personalized wrapping gives the weapon a story the image can show. Avoid adding unexplained runes, official faction marks, or dramatic effects unless they are genuinely important to the original character. A fighter’s equipment feels specific when its wear and placement explain how the person handles it.
- Weapon choice: select one sword, axe, spear, bow, hammer, or other fitting visual anchor.
- Placement: use a clear hilt, edge, shaft, grip, or strap that stays inside the crop.
- Condition: add one visible sign of use such as a worn grip, repair, or carefully maintained edge.
Use battle-worn details to show personal history
Battle wear is useful when it points to a specific history. One old scar near the brow, a repaired shoulder seam, a faded cloth strip, a dented buckle, a replaced glove, or a grip darkened by use can tell the viewer that the equipment has been handled. Choose one or two marks and place them deliberately. Random scratches across every plate create texture, but selective wear creates a character question: what happened here, and why did the person keep this piece?
Balance wear with one sign of care. A veteran may polish the weapon while leaving the leather patched; a guard may keep a uniform clean while carrying an old repair; a mercenary may replace a broken strap with a practical knot. This contrast keeps the Fighter from looking like a generic damaged warrior. It also helps the portrait show discipline: the character responds to wear rather than simply collecting it.
Personal history can be quiet. A family clasp, old map tube, color-wrapped grip, inherited pendant, or small keepsake may matter more than a dramatic scar. Keep the object simple and visible near the chest, shoulder, or hand. The mark should support the face and posture, not turn the portrait into a puzzle that requires a paragraph of lore to understand.
One-history rule
Pair one visible sign of damage or wear with one sign of care or attachment. The contrast gives the Fighter history without covering the portrait in effects.
Balance ancestry, presentation, and Fighter identity
A D&D fighter portrait can begin with any supported ancestry and presentation. Let ancestry shape the face, ears, horns, scales, build, hair, or other visible cues, then let the Fighter role shape posture, armor, weapon, and practical habits. The two layers should support each other without turning ancestry into a stereotype. A Dwarf Fighter can be a patient shield guard or an agile scout; an Elf Fighter can use polished technique or weathered field gear; an Orc Fighter can be careful, diplomatic, or quietly tired.
Choose one ancestry cue and one role cue that remain visible in the same crop. For example, a clear pointed ear can sit above a worn shoulder guard; a scaled jaw can contrast with a repaired leather collar; or a compact build can pair with a long spear line at the edge of the frame. Then choose a presentation, expression, and color relationship that belong to the individual. Avoid letting helmets, masks, hair, or effects cover the features that make the character distinct.
- Ancestry cue: face shape, ears, horns, scales, hair, build, or another readable feature.
- Role cue: practical armor, weapon position, trained posture, or equipment condition.
- Individual cue: expression, presentation, color accent, repair, keepsake, or personal grooming choice.
Turn D&D fighter character design into a portrait brief
Write the final brief in the order a viewer should read the image: individual identity, Fighter role, ancestry, expression, posture, armor silhouette, materials, weapon, condition mark, lighting, quiet setting, and upper-body square crop. A compact example might read: “A patient human Fighter with a focused gaze, balanced three-quarter stance, repaired charcoal brigandine over rust cloth, a low-held longsword with a wrapped grip, and one old brow scar under clear overcast light.” It names visible decisions without turning the image into a character sheet or rules summary.
Use the guided generator fields to keep the categories separate. Put Fighter in the role control, then use signature equipment for the weapon and armor anchor, visible appearance for face, grooming, scars, and material condition, and mood or setting for posture, expression, light, and background. Start with the smallest useful brief. If the first result misses, diagnose the largest visible mismatch instead of adding adjectives to every field.
Change one category per revision. If the face is hidden, open the collar or reduce the background contrast. If the role disappears, clarify the weapon position and shoulder line. If the result feels like a Paladin, remove sacred emblems and ornate plate and return to practical gear, training, and personal wear. If the image is too busy, keep the face, one armor shape, one weapon, and one history mark while simplifying everything else.
NanoEditor creates one image per generation. One successful guest generation is shared across the site; failed generations do not consume it. Google signup grants 20 credits, each portrait costs 10 credits, and account results are private by default. When the brief is ready, open the D&D fighter portrait generator with Fighter preselected and compare one focused change at a time.
- First pass: face, discipline, posture, armor shape, materials, one weapon, one history mark, light, and crop.
- Thumbnail check: face, shoulder silhouette, weapon edge, and personal mark remain separate.
- Revision rule: preserve the strongest anchors and change only the category that is visibly weak.
- Scope check: keep the result to one upper-body square portrait, not a sheet, stat block, token set, full-body scene, or party image.
Put the guide into practice
Create a D&D fighter portrait
Start with Fighter preselected, then turn training, posture, armor, weapon, and battle-worn details into one focused upper-body portrait.
Start creating